I recently saw a reel on Instagram with this tall, thin, gorgeous 20 something young…
Hand Balancing and Pole Tricks
Handstands seem to be the new must have trick for pole dancers. If you are on Instagram, you are bound to see videos of your favorite pole stars working on handstand presses and bendy handstands. You’ve probably had to do some handstand drills in the conditioning portion of your pole class too (handstands are one of the three top exercises I recommend to pole dancers and aerialists). As someone who trains in many circus arts including hand balancing, I’d like to share some tips and my favorite hand balancing tricks for pole.
First, it takes a lot of work to have the perfect handstand with a clean and consistent exit and entry. Many people people kick up into handstands. This can be ok for some of your training, but you should always be working towards a press. Kicking up sends a big ripple through your body and it’s much harder to get on balance after that. I also see many people holding a mostly straight pencil shape handstand but with a slight back arch. Don’t be one of those people! This will shorten the longevity of your handstand (being totally stacked, i.e. joints lined up, uses much less energy). It also makes you look like an amateur, sort of like how you can tell if someone is new to pole by how they do their aerial inverts.
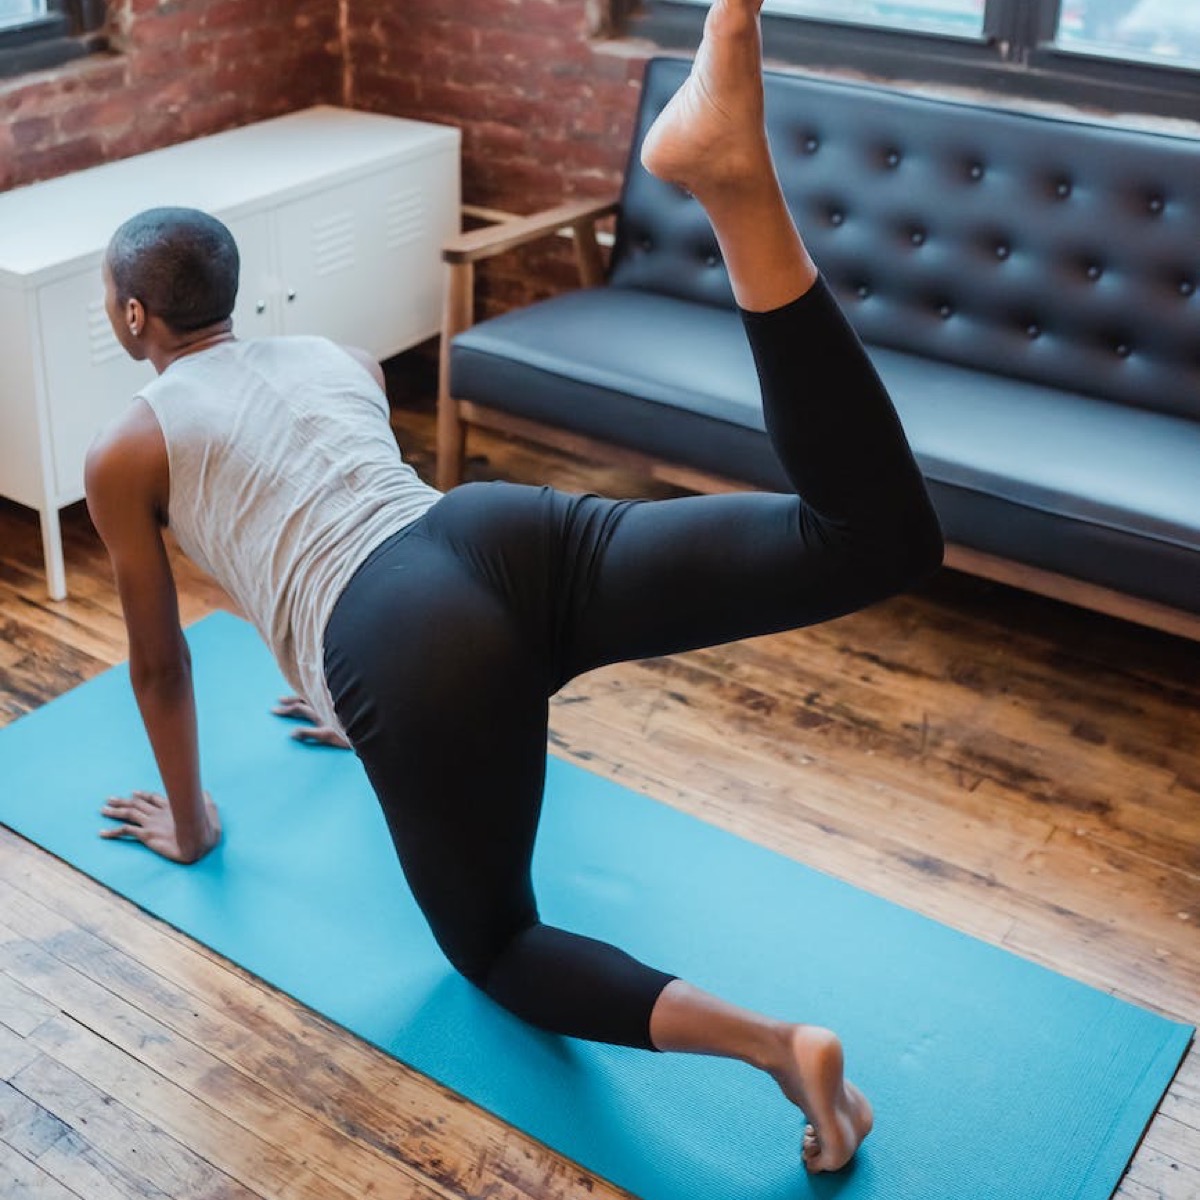
I’ve learned many off pole handstand drills that have not only improved my hand standing abilities, but also my pole handstand tricks. First, if you train your handstands on a wall, make sure your chest is towards the wall, not your back. You need the reinforcement on this side to maintain a hollow position. If you train with your back towards the wall, it’s almost impossible not to arch a little bit unless you already have your handstand. However, if you’re training a contortion handstand (back arched as much as possible), feel free to turn around. Once you’re up on the wall, try to counterbalance by splitting your legs apart (Photo 1). You must point hard with your feet, keep very straight knees, and stay hollow. Focus on breathing. Next, in the same position but with both feet on the wall, try walking on your hands away from the wall and then towards the wall while staying hollow. This is a great conditioning exercise. Try to challenge yourself and walk all the way into a push up position!
Now let’s talk about presses. A press is when you only use your own strength to lift your body into position, i.e. use no momentum. A handstand press is quite difficult. If you’re not limber in hips, you will have to be much stronger to compensate. The first step is to try to stack your hips over your shoulders (which should be directly over your hands). This is where the flexibility comes in. If you can’t stack your hips right over your shoulders (many people can’t), you will need to start by shifting your shoulders forward of your hands to get your hips over your hands. Next, in either a pike (legs together) or a straddle, lift your legs! It’s not easy. I suggest training your headstand press first, which is much easier. Train it in both a straddle and a pike. Try to descend from your headstand slowly, tap the floor with your feet and go back up into a headstand. Aim for 10 reps. You can try these with all your pole handstands and ayeshas too. You should also descend out of your handstand as slowly as possible (how can you expect to deadlift into a handstand if you can’t descend with control?). Here’s one more exercise to try: put your hands on the ground, facing away from a wall. Tip your shoulders forward until you feel your feet lighten up. Then, try to shoot your feet up to the wall if you can, while keeping your shoulders engaged the whole time.
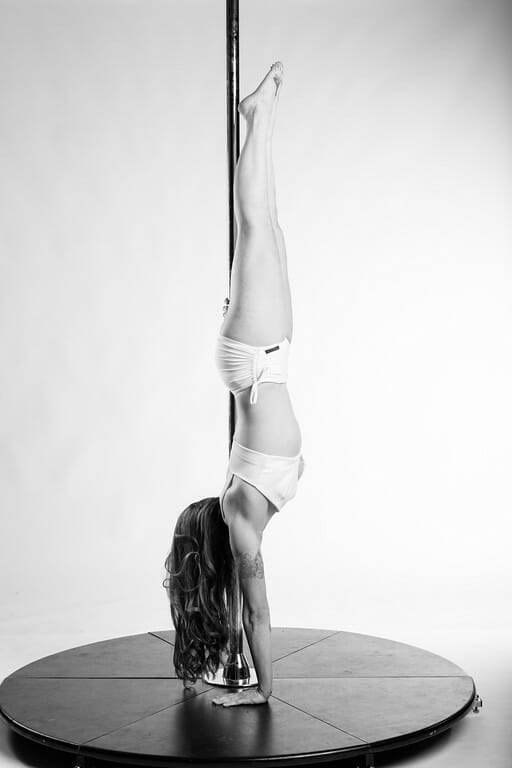
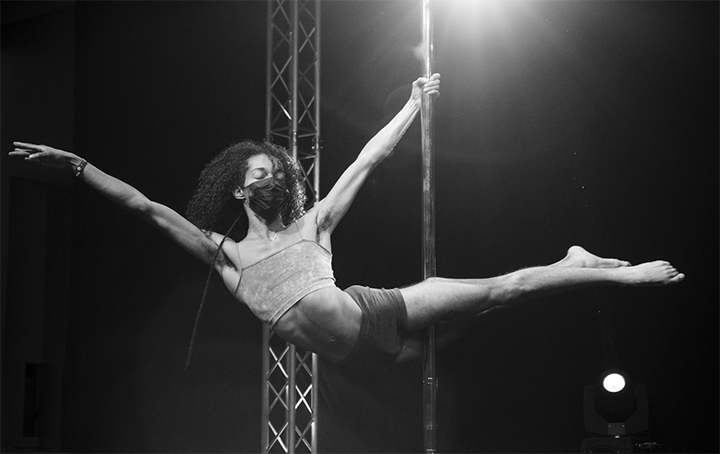
One of the most common pole handstands is the yogi handstand (Photo 2). Start with the pole to your side. Lift your arm on that same side straight back as you reach for the floor with your other hand. Grab the pole and make sure you’re in proper handstand position. Remember, the pole is replacing one of your arms in a sense. Your hand on the floor should be within shoulder width of the pole. Next, try to stack your hips over your hands if you can and lift. If you can’t, a little kick is ok, but don’t reach for the pole with your foot- this totally messes up your form and you don’t need it to get up. With the being said, if you can do a back split, you can do the split with your top foot on the pole and then push a little bit to transition into this handstand for a different entry. Try different shapes. A hollow pencil is always great to train, while a double stag is the easiest to hold. Contortion handstands and fang position are also pretty if you’re back bendy, or banana if you have flexy shoulders.
If this yogi handstand is difficult for you, try a yogi forearm stand. Instead of putting a hand on the floor, put your hand on the pole next to the base, thumb up, and elbow on the floor. This is much easier to balance since you’re so low to the ground. Try a press here, it’s much easier!
There are many exits out of the yogi handstand. Try an outside leg hook and sit up to the pole (you should be able to do a no-handed jasmine before attempting this). Next, if you can sit up out of a brass monkey, try a brass hook to sit up (leg closest to the pole hooks). You can also do a front walkover. From standing, in one motion step into a yogi handstand with split legs, then (without switching legs) continue down into a back bend position while leading with the same leg the whole time. Your hand on the floor will need to turn a little, so keep it loose. Keep your hand on the pole strong, and make sure to arch as you go over. If that’s easy, see if you can kick back over from the back bend to handstand or standing.
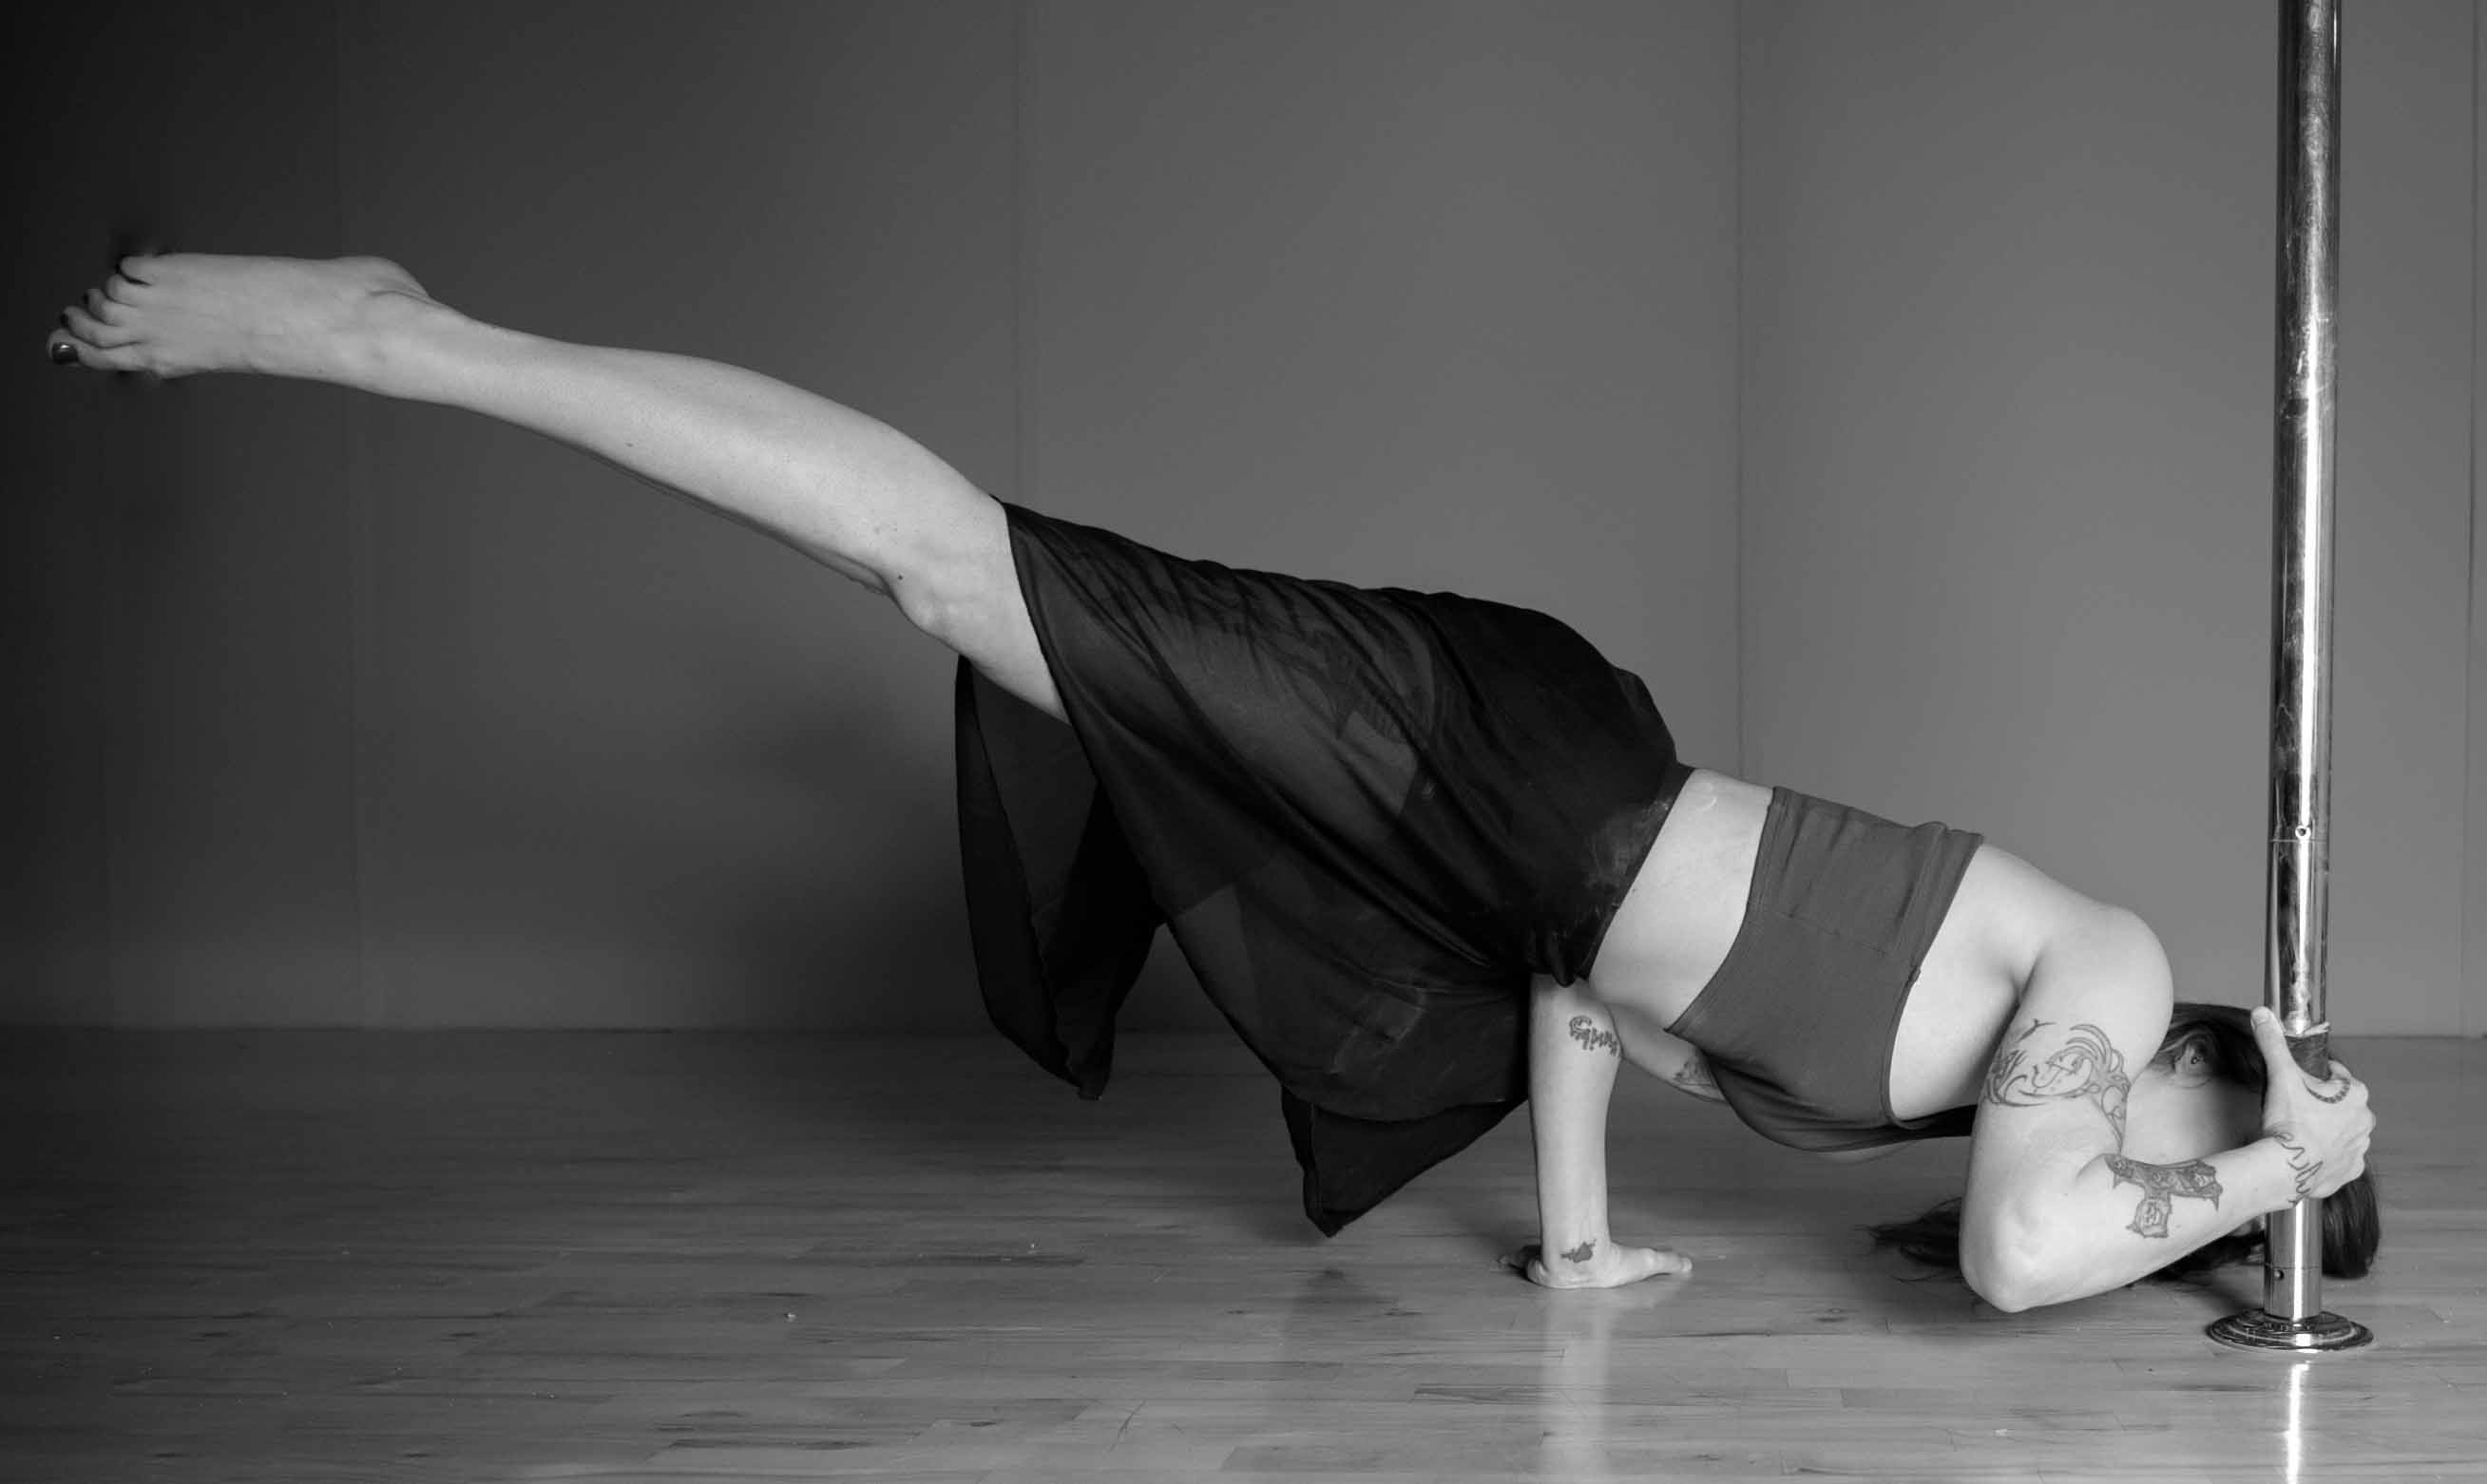
Finally, one of my favorite floor work tricks is the grounded skyline (Photo 3). For those of you who do yoga, this is essentially a crocodile with one hand on the pole. Start on your knees or in a very low straddle. The pole should be in front of you and a little bit to one side. Put the hand farthest from the pole on the ground right below your belly button. Now here’s the part that takes some getting used to: put the elbow of that same arm into your torso near your diaphragm. Most of your weight will be balanced on this arm. With your other hand, reach for the pole. For extra support, put your elbow on the ground and/or your shoulder into the pole. Next, using your lower back and core, lift your legs. That’s your grounded skyline! It’s helpful to also train your one-handed crocodile on handstand canes if you can, or even train it on the floor without a pole. When doing those, the arm that would have been holding onto the pole is an important counterbalance and should be reaching straight forward and right next to your ear (not on the floor!).
Happy training! Please share your favorite handstand tricks and combos!

Jody Ryker is a performer and instructor in the bay area specializing in acrobatic pole and aerial hoop. She teaches at Aerial Arts Santa Cruz four days per week. Jody also founded the acrobatic and aerial performance company Pole Diversity (www.polediversity.com). Jody is also working on a PhD in pure math at UCSC.
Latest posts by Jody Ryker (see all)
- Putting on Your First Pole Show: Part 1 - July 14, 2017
- Pole Inspiration - May 5, 2017
- Finding the Right Pole Teacher - March 3, 2017
Related Posts